如何在Chainer写一个训练循环
在本教程部分中,我们将学习如何训练一个深度神经网络,以在流行的MNIST数据集中对手写数字的图像进行分类。这个数据集包含50,000个训练样本和10,000个测试样本。每个样本都是一组28 x 28灰度图像和相应的类标签。由于使用了从0到9的数字,因此标签有10个类别。
Chainer提供了一个叫Trainer的功能,可以简化模型的训练过程。但是,在开始使用隐藏实际流程的有用Trainer类之前,了解Chainer中的训练是如何工作也是一件好事。编写自己的训练循环对于学习训练器的工作方式或实现标准训练器未包括的特性是非常有用的。
完整的培训过程包括以下步骤:
- 准备一个数据集
- 创建一个数据集迭代器
- 定义一个网络
- 选择一个优化算法
- 写一个训练循环
- 从训练数据集中获取一组示例(小批量)。
- 将小批量批次送入您的网络。
- 运行网络的正向传递并计算损失。
- 只需从损失变量中调用backward()方法来计算所有可训练参数的梯度。
- 运行优化器来更新这些参数。
- 保存已经训练过的模型
- 通过保存的模型执行分类并检查验证/测试集上的网络性能。
%matplotlib inline
1. 准备一个数据集
Chainer包含一些内置函数,可以使用一些流行的数据集,如MNIST,CIFAR10 / 100等。它们可以自动从服务器下载数据并提供易于使用的数据集对象。
下面的代码显示了如何从服务器检索MNIST数据集并从其训练分割中保存图像,以确保正确获取图像。
from __future__ import print_function
import matplotlib.pyplot as plt
from chainer.datasets import mnist
# Download the MNIST data if you haven't downloaded it yet
train, test = mnist.get_mnist(withlabel=True, ndim=1)
# Display an example from the MNIST dataset.
# `x` contains the inpu t image array and `t` contains that target class
# label as an integer.
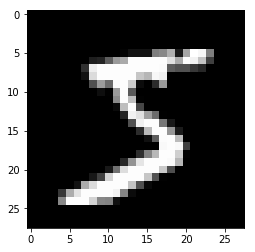
x, t = train[0]
plt.imshow(x.reshape(28, 28), cmap='gray')
plt.savefig('5.png')
print('label:', t)
label: 5
import numpy as np
import chainer
from chainer import cuda, Function, gradient_check, report, training, utils, Variable
from chainer import datasets, iterators, optimizers, serializers
from chainer import Link, Chain, ChainList
import chainer.functions as F
import chainer.links as L
from chainer.training import extensions
2. 创建一个数据集迭代器
虽然这是一个可选的步骤,但我们想介绍一下Iterator类,该类从给定数据集中检索一组数据和标签,以便轻松进行小批量处理。有一些子类可以以不同的方式执行相同的事情,例如,使用并行处理来并行化数据加载部分等。在这里,我们使用SerialIterator,它也是下面示例代码中的Iterator的子类。 SerialIterator可以在给定数据集中提供或不提供数据乱序的情况下提供小批量数据。
所有迭代器通过调用next()方法产生一个新的小批量。所有的迭代器都有属性来知道我们从给定的数据集需要多少个 epoch 才能获取所有数据的次数,以及下一个最小批次是否将成为新的 epoch(is_new_epoch)的开始,依此类推。
下面的代码显示了如何从数据集对象中创建一个SerialIterator对象。
from chainer import iterators

# Choose the minibatch size.
batchsize = 128

train_iter = iterators.SerialIterator(train, batchsize)
test_iter = iterators.SerialIterator(test, batchsize,
                                     repeat=False, shuffle=False)
迭代器可以将内置的Python列表作为给定的数据集。这意味着下面的示例代码是可以工作的,
train = [(x1, t1), (x2, t2), ...]  # 一个元祖列表
train_iter = iterators.SerialIterator(train, batchsize)
其中x1,x2,…表示输入数据,t1,t2,…表示相应的标签。
SerialIterator 的细节
-
SerialIterator是Iterator的一个内置子类,可以按顺序或混洗顺序从给定数据集中检索一个小批量。 - 迭代器的构造函数有两个参数:一个数据集对象和一个最小批量大小。
- 如果要在训练过程中重复使用相同的数据集,请将repeat参数设置为True(默认)。否则,数据集将只被使用一次。
- 后一种情况实际上是为了评估。如果您想在每个epoch洗牌训练数据集,请将shuffle参数设置为True。否则,从数据集检索的每个数据的顺序将在每个时期始终相同。
在上面显示的示例代码中,我们在train_iter和test_iter中都设置了batchsize = 128。所以,这些迭代器一次将提供128个图像和相应的标签。
3. 定义一个网络
现在让我们定义一个要训练的神经网络来分类MNIST图像。为了简单起见,我们在这里使用三层感知器。我们将每个隐藏层设置为100个单元,并且将输出层设置为10个单元,这对应于MNIST的类别标签的数量。
将您的网络创建为Chain的子类
您可以通过编写Chain的新子类来创建您的网络。主要步骤是双重的:
- 将具有可训练参数的网络组件注册到子类。它们中的每一个都必须实例化并分配给由
init_scope()指定的范围中的一个属性: - 定义一个
__call __()方法来表示网络的实际前向计算。该方法将一个或多个Variable,numpy.array或cupy.array作为输入,并使用它们计算正向传递。
class MyNetwork(Chain):

    def __init__(self, n_mid_units=100, n_out=10):
        super(MyNetwork, self).__init__()
        with self.init_scope():
            self.l1 = L.Linear(None, n_mid_units)
            self.l2 = L.Linear(n_mid_units, n_mid_units)
            self.l3 = L.Linear(n_mid_units, n_out)

    def __call__(self, x):
        h = F.relu(self.l1(x))
        h = F.relu(self.l2(h))
        return self.l3(h)

model = MyNetwork()
Link,Chain,ChainList和那些包含可训练参数的子类对象应该通过init_scope()内部的属性赋值给模型。例如,一个Function不包含任何可训练的参数,所以不需要将该对象保留为网络的一个属性。当你想在你的网络中使用relu()时,在__call __()中使用它作为函数可以正常工作。
在Chainer中,实现前向计算的Python代码本身代表了网络。换句话说,我们可以在概念上思考我们的网络的计算图是在这个前向计算代码执行时被动态构建的。这允许Chainer描述可以在每次迭代中执行不同计算的网络,例如分支网络,直观且具有高度的灵活性。这是Chainer的关键功能,我们称之为边定义边运行。
4. 选择一个优化算法
Chainer提供了多种优化算法,可用于在训练期间优化网络参数。他们位于optimizers模块。
在这里,我们将使用由MomentumSGD实现的动量随机梯度下降(SGD)方法。为了使用优化器,我们将网络对象(通常是Chain或ChainList)提供给优化器对象的setup()方法进行注册。通过这种方式,优化器可以自动查找模型参数并在训练期间进行更新。
您也可以轻松地尝试其他优化器。请测试并观察各种优化器的结果。例如,您可以尝试将MomentumSGD更改为Adam,RMSprop等。
from chainer import optimizers

# Choose an optimizer algorithm
optimizer = optimizers.MomentumSGD(lr=0.01, momentum=0.9)

# Give the optimizer a reference to the model so that it
# can locate the model's parameters.
optimizer.setup(model)
在上面的例子中,我们在构造函数中将
lr设置为0.01。这个值被称为“学习率”,这是为了获得最佳性能而需要调整的最重要的超参数之一。各种优化器可能每个都有不同的超参数,所以一定要检查文档的细节。
5. 写一个训练循环
我们现在展示如何编写训练循环。由于我们正在处理数字分类问题,我们将最小化优化器的损失函数 softmax_cross_entropy()。对于其他类型的问题,如回归模型,其他损失函数可能更合适。有关更多详细信息,请参阅Chainer文档以获取有关各种损失函数的详细信息。
我们的训练循环结构如下:
- 我们将首先从训练数据集中获取一小批样本。
- 我们以通过函数调用的形式这个批样本馈入网络中作为一个函数调用它(一个
Chain对象)。这将执行__call __()方法中写入的前向代码。 - 这将返回表示类标签预测的网络输出。我们将其与真实(即目标)值一起提供给损失函数。损失函数将输出损失作为一个
Variable对象。 - 我们清除网络中任何以前的梯度,并通过在损失变量上调用
backwrad()计算参数梯度执行反向传递。我们需要首先清除梯度,因为backward()方法是累积渐变而不是覆盖先前的值。 - 由于优化器已经有了对网络的引用,所以它可以访问参数和计算出的梯度,以便我们现在可以调用优化器的
update()方法来更新模型参数。
除了上述步骤之外,您可能还想使用验证数据集来检查网络的性能。这可以让您观察迄今为止对新数据的泛化程度,也就是说,您可以检查它是否过度拟合训练数据。下面的代码检查每个epoch结束时测试集的性能。该代码具有与训练代码相同的结构,除了不执行反向传播,我们还使用precision() 函数计算网络在测试数据的准确性。
训练循环代码如下:
import numpy as np
from chainer.dataset import concat_examples
from chainer.cuda import to_cpu

max_epoch = 10
gpu_id=-1

while train_iter.epoch < max_epoch:

    # ---------- One iteration of the training loop ----------
    train_batch = train_iter.next()
    image_train, target_train = concat_examples(train_batch, gpu_id)

    # Calculate the prediction of the network
    prediction_train = model(image_train)

    # Calculate the loss with softmax_cross_entropy
    loss = F.softmax_cross_entropy(prediction_train, target_train)

    # Calculate the gradients in the network
    model.cleargrads()
    loss.backward()

    # Update all the trainable paremters
    optimizer.update()
    # --------------------- until here ---------------------

    # Check the validation accuracy of prediction after every epoch
    if train_iter.is_new_epoch:  # If this iteration is the final iteration of the current epoch

        # Display the training loss
        print('epoch:{:02d} train_loss:{:.04f} '.format(
            train_iter.epoch, float(to_cpu(loss.data))), end='')

        test_losses = []
        test_accuracies = []
        while True:
            test_batch = test_iter.next()
            image_test, target_test = concat_examples(test_batch, gpu_id)

            # Forward the test data
            prediction_test = model(image_test)

            # Calculate the loss
            loss_test = F.softmax_cross_entropy(prediction_test, target_test)
            test_losses.append(to_cpu(loss_test.data))

            # Calculate the accuracy
            accuracy = F.accuracy(prediction_test, target_test)
            accuracy.to_cpu()
            test_accuracies.append(accuracy.data)

            if test_iter.is_new_epoch:
                test_iter.epoch = 0
                test_iter.current_position = 0
                test_iter.is_new_epoch = False
                test_iter._pushed_position = None
                break

        print('val_loss:{:.04f} val_accuracy:{:.04f}'.format(
            np.mean(test_losses), np.mean(test_accuracies)))
epoch:01 train_loss:0.1858 val_loss:0.2564 val_accuracy:0.9267
epoch:02 train_loss:0.3932 val_loss:0.1877 val_accuracy:0.9460
epoch:03 train_loss:0.1088 val_loss:0.1505 val_accuracy:0.9542
epoch:04 train_loss:0.1247 val_loss:0.1264 val_accuracy:0.9623
epoch:05 train_loss:0.0434 val_loss:0.1212 val_accuracy:0.9640
epoch:06 train_loss:0.1539 val_loss:0.1124 val_accuracy:0.9657
epoch:07 train_loss:0.0319 val_loss:0.0997 val_accuracy:0.9706
epoch:08 train_loss:0.0913 val_loss:0.0992 val_accuracy:0.9703
epoch:09 train_loss:0.0966 val_loss:0.0981 val_accuracy:0.9704
epoch:10 train_loss:0.0807 val_loss:0.0867 val_accuracy:0.9731
6. 保存训练好的模型
Chainer提供了两种可用于保存和恢复模型状态的序列化器。一个支持HDF5格式,另一个支持NumPy NPZ格式。对于这个例子,我们将使用NPZ格式来保存我们的模型,因为它很容易与NumPy一起使用,并且不需要安装任何额外的依赖或库。
serializers.save_npz('my_mnist.model', model)
7. 基于保存的模型执行分类
让我们使用保存的模型来分类新的图像。为了加载训练好的模型参数,我们需要执行以下两个步骤:
- 实例化您所训练的网络。
- 使用load_npz()函数使用保存的权重覆盖模型实例中的所有参数。
一旦模型恢复,它可以用来预测新的输入数据上的图像标签。
from chainer import serializers
# Create an instance of the network you trained
model = MyNetwork()
# Load the saved paremeters into the instance
serializers.load_npz('my_mnist.model', model)
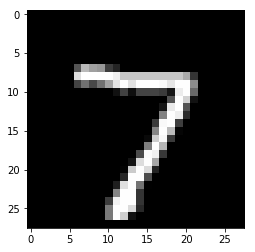
# Get a test image and label
x, t = test[0]
plt.imshow(x.reshape(28, 28), cmap='gray')
plt.savefig('7.png')
print('label:', t)
label: 7
# Change the shape of the minibatch.
# In this example, the size of minibatch is 1.
# Inference using any mini-batch size can be performed.

print(x.shape, end=' -> ')
x = x[None, ...]
print(x.shape)

# forward calculation of the model by sending X
y = model(x)

# The result is given as Variable, then we can take a look at the contents by the attribute, .data.
y = y.data

# Look up the most probable digit number using argmax
pred_label = y.argmax(axis=1)

print('predicted label:', pred_label[0])
(784,) -> (1, 784)
predicted label: 7
预测结果看起来是正确的。好极了!